How to use the Master BOL Generator Screen
Faro Master BOL
Generation
The FWHIP Master BOL Screen can be found in the menu option Radio Beacon under Shipping option Consolidation Shipments.
Upon opening the screen we see a few options available to us. Our standard Client Name and Cust Name to isolate only those Sales Orders associated with our client/cust relationship.
I've picked our TST (TEST) client and their customer EBAGS for this tutorial. This allowed the grid to populate with any order that is already allocated and in the state of Ready to Wave for TST/ebags.
The Master BOL is an auto Generated Number. It looks in Accellos for the TST's assigned Vendor number in their setup and then looks for a corresponding client cust relationship with the config value of FARO_BOL in accellos 1 configuration table. If no configuration value is found it uses the default value in config.sys and uses 999999999 as the seed number. So we see this value increments from table values and can be controlled so sequential Master BOL Numbers on a Client Cust relationship. Right clicking will auto generated the master bol number for you. But you can type one in if you have a need to add an existing BOL to additional orders not previously choosen. You do not have to use the Right Click Generation Feature.
By blanking out the Master BOL Number the checked grid Sales orders will be updated with a blank Master BOL if you so need to do this. You can also manually delete the Master Bol from the Grid rows if necessary.
Trailer Number is optional. It sometimes is unknown. Individual requirements determine it's use. This can also be added in the final Shipping screen in Accellos 1
Pro Number or Shipment number is an optional setting. If you know it in advance it's easer to insert it here than on each individual record. But you can also add it later if you choose to. The ability to come back to existing records is as simple as setting your client filter at a later date. But the main thing is , the order cannot be shipped and uploaded to update the record.
Ship Via reads the Carriers Table. If your Carrier is not present in the list and would like it added, contact the IT Dept to add your carrier. Be sure to have your carrier's 4 digit SCAC code and the proper spelling of the Carriers full readable name.
Now you can see the check box for Create BOL#. I suggest you keep this checked but you may find a reason not to. This generates a VICS compliant BOL Number for you. Otherwise in Accellos you can use the BOL Screen to create a single VICS BOL. The configuration should be setup ahead of time. If the BOL does fail to print out of Accellos BOL screen, contact your IT DEPT.

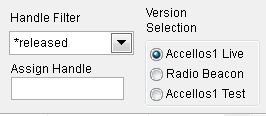
The next options we might have use for are the Handle and the Handle Filter. The Handle Filter will allow you to issolate Sales Orders by Accellos 1 Handles. In the example below we are only looking at Sales Orders with the handle of *released.
The Assign Handle will apply a handle which will be then updated in Accellos upon saving your changes. Leaving this blank causes this field to be ignored upon using the update function.
Version Selection allows you to pick between different servers for your data. Default is Accellos 1. Upon changing the Version Selection you must go back and set your Client Cust relationship and set your additional parameters accordingly.
If you have made any changes prior to changing the Version Selection you should be asked to update your data in Accellos 1 if you have made any Changes.
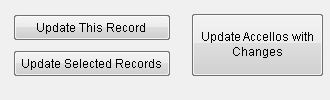
Which brings us to the Update options. You can update a single record or all Selected Records. A selected record is a record with the last column of the grid checked. Otherwise Updating Selected Records has no effect on the table. It is not necessary to be checked to Update This Record.
And to propogate your changes to Accellos use the Update Acellos with Changes button. If you close the form or change a client cust relationship and have made any changes to any records this button fires automatically.
Now the grid fields are editable. you can indeed re-size the fields using the header captions row and it is suppose to remember your last changes. Also remember the last row has your check box to allow you to utilize the Update Selected Records option mentioned above. You may think why must I check each box? keep in mind this is faster than updaing every record individually in Accellos. checking a box is not so hard once you think about it.
Weight and Vol are pulled from the Product Master Table. If your values are empty then the values here are zero. Certain fields in this grid are protected. Others are not.
Master BOL field if blanked out will allow you to remove it from a trailer shipment. Filling it in adds it to a trailer with corresponding records whose Master BOL matches. The ultimate EDI connections is that Master Bol gets assigned to the ShipHist Consolidation Number field found in the Shipping Screen.
IMPORTANT NOTE:
It is important not to add a shipment Condsolidation Number when Shipping Sales Orders off of Accellos when using the advantages of this Master BOL Screen. If you set the MASTER BOL number here do not set the Shipment Consolidation Number in the Shipping screen of Accellos. The connection will be lost for multiple shipments on a single trailer. And the EDI will not be correct causing possible charge backs for us and our clients.
